Thursday, 22 November 2012

The foliage of Ether… so far… and mostly the grass!


The next challenge of Ether was foliage, specifically the Grass. As always, the grass needed to be optimised to its full potential, and of course, not compromise the ether style at all.

The original approach I took was to create 3D blades of grass using planes, and then use those shapes to paint over in the texture. Since the blades of grass were going to be very thin, utilising the linework and loose brush style of Ether wasn’t much of an option, and this was very obvious, especially when looking at the grass from close up. However, this first approach became a good starting point for the wind simulation and subsequent foliage approaches… at least now I knew what NOT to do! (in terms of texture and shape!)


And it is the wind expression that became very important. To bring life to the environments, we wanted the grass to move with the wind.

For this, I began using the same expression as I did with the ocean waves (the mesh would be pushed in different directions, but it’s the same basic concept)… the problem was that I needed the base of the grass to stay still and I wanted for us to be able to change the direction, strength and speed of the wind on the fly, without having to make major changes to the material. On another note, I needed this material to work across the board when it comes to foliage, so I began to put a system in place so that all foliage would work with these rules. It took a long time to get it to work, but I believe the amount of time it will save down the line will be priceless to a small studio with only 2 artists like WPG.


To get the wind to work, I needed to introduce “Wind Direction and Source” into the material. The basic concept is to convert this information into a vector (to specify the direction and strength of the wind) so that we could change it on the fly. This is multiplied by the wave expression and voila! It doesn’t work! ... Sadly, one of the things I overlooked was the fact that doing the wind in this way would displace the whole mesh… so even the base of the grass was moving… this resulted in a very unconvincing, almost comical version of the grass that was floating and moving around the environment. The good news is that it was easily fixed! All I had to do was multiply that expression by a vertex colour… in this case, the red colour. This way, any verts in the mesh that are coloured in red will move, while black ones will stay still. This meant that I had to go back and edit all my grass plane meshes and vertex paint them accordingly. Once this was done, the result was much more convincing!


Now I had the grass working, however, I couldn’t get past the fact that the grass did not follow the Ether artistic style, so I had to take a new approach in terms of the type of mesh I used.

The new meshes were thick, had a much better view from above and allowed me to paint the textures following the artistic style of Ether…All of the vertex painting rules had to be followed, but knowing that in advance made the workflow that much faster… I’m really happy with the results and I think it does justice to Ether’s artistic direction.


Now, although the grass was looking good, and I had created a system that could be used across the board in all foliage, the actual meshes themselves weren’t too reusable… if we wanted to make an autumn scene, we had to repaint the textures all over again, costing us a lot of time and a lot of memory!... this needed to be fixed, not only on the grass level, but across all foliage.

Luckily, it was an easy fix, and a rather functional one! All I had to do was multiply our diffuse texture with a Vector Parameter… then we can create an instance of the material, and we have completely versatile grass colours on the fly.

Here is a video detailing the grass shader and its reusability, as well as other types of folliage:


Now we have the shader out of the way… now we can focus on the rest of the foliage…  Having discovered that thin shapes don’t go with “Ether” style, creating the rest of the foliage was an incredibly fun and enjoyable experience… I still haven’t finished, but a lot of it is in place!

Here are some pictures of some types of foliage and a video to see them in action:


Here is a video of some gameplay for Ether, where you can see the folliage and water in action :)


In this edition of foliage, I have chosen not to put any trees in, although a more in depth explanation of how I am making the trees for Ether is coming very soon!

Although I feel that the grass shader is getting close to being finished, I still want to introduce some stuff for decay and burning foliage… I’ll keep you updated on my progress J

Thanks for taking the time to stop by and read! If you have any questions, please ask!

Next up, Particle Systems!!

Water... a lot of it!!


The first challenge at White Paper Games came in the form of water. Replicating realistic water is quite a feat on its own, however, for Ether, we required the water to make sense with the world and follow the artistic style that we had already established for the game. This created a number of challenges that needed to be solved:

-          How do we make the water hold up to the visual style of Ether?

-          How can we make water using the minimum amount of resources possible?

-          Can we make the water reusable and applicable to non-ocean instances?

-          How can we animate the water without any physics simulations?

This set of questions had to be answered and here is the result we have come up with:


The first and foremost concern I had was to keep the visual style of Ether intact. Therefore, the normal map that would create the ripples would have to be hand painted.

I used Corel Painter for this instead of Photoshop. In Corel, you can adjust the amount of paint added to the brush and make it lit so that it feels thick and painted on canvas; I felt this was crucial in order to get a good painterly effect on the water. The result was pretty bad for the first set of tries but I ended up getting an effect that was quite nice:


Now I just had to mix a couple of sets of normal and pan them in different directions and a subtle effect was created!


Now that the ripples were sorted, I needed to focus on animation… an ocean has waves and this couldn’t be simulated with physics considering our limitations, so a workaround had to be found. I started doing a lot of research into how to solve this and began to create a solution to this problem.

Using the world displacement node in the material, I could displace certain parts of the mesh based on a mathematical expression. The fastest way to do this was using a Sine wave. In short, it creates a wave that varies from black to white, making everything that’s white push up, and everything that’s black go down. The good thing about this is that it’s extremely cheap (only 4 instructions in the material).  The only downside to this is that it works based on the amount of verts the mesh has, so it meant our water shader had to be quite highpoly. In the end, we went with a 2048 triangle mesh, which is still pretty low poly for a whole Ocean!

Here is a small picture of the wave expression:


 The next problem was to make the oceans depth believable and also make the foam for the water when it hits other meshes.

For the foam, using a depth biased alpha with a foam texture worked fine. For the translucency, playing with a few values did the trick and the results were quite convincing.

Here are a couple of videos, one explaining my approach, another just showing the water in action, inside the game:


This expression is highly reusable, in fact, it became the base for all foliage and wind based materials in the game! So I’m very happy I took the time to make sure this material was spot on and game ready as soon as possible.

Next, I will begin to talk about the foliage for Ether!

Stay tuned!!

Small change of plans


Hello again!

So… the has been a small change of plans regarding what I’ll actually be doing for my MA. Although I would love to delve deeper into tessellation and next gen processes, (which I will, at a later date as part of my MA as well…) I’m going to focus on showing the work I am doing at white paper games, specifically focusing on how we can use technology to enhance our workflow speed and efficiency while keeping the artistic value and style of our project intact. I would also like to explore how important it is for an indie studio to have these measurements in place in order to achieve a goal as ambitious as our debut title: “Ether one”.

Over the next few days I will be updating this blog explaining everything I have done and used in Ether, and hopefully provide some insight as to how it has affected our workflow (or how it will down the line).


Friday, 26 October 2012

And here are the Results in UDK

I did my tessellation video, I'm very happy with the results! Problems still appear though:

Fixing seams seems imperative at this point.

After talking with my tutor Josh... do we need lighting information in the Diffuse now that the engine is handling all of that? Do we need such a detailed normal map?

In any case, here is the video documenting my progress:

Normal maps... depthmaps! EVERY MAP!!

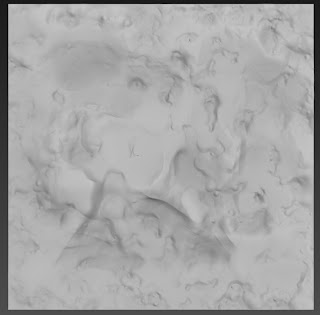
Now that I have finished my sculpting process, I have extracted a number of maps based on the information I put into my sculpt. Here are the maps I generated:

Normal Map:

Used for Current Gen set ups, to aid with the comparison I'm making.


DepthMap:

Used to generate tessellation based on our Depthmap.


And then I created my Diffuse and Specular Maps:


More Updates


 Here is some of my progress! I just finished creating a sculpt of my rocks for the rock wall. As you can probably see, I tried to exaggerate the shapes and crevices of the rocks quite a lot. The idea behind this is to see how well my depth map will portray my sculpt and see if it can really be used to have fully artist controlled assets using tessellation. 


After that, I created a base or “mud” layer on which the bircks would rest. In this case, I tried to make the details subtle… this will test if the depthmap can translate the subtle information into good tessellation.


The final result is this:


So now, I just have to put it into UDK and hopefully make it work!


Small Update


This post is just to give you a small update on what I will be working on. As mentioned earlier, I will be exploring the possibilities on Tessellation using sculpts and depth maps based on those sculpts. For this test, I will be creating a stone wall. The reason behind making a stone wall is that it will give me a very clear representation on how the tessellation is working, and it will make it easy to create a depthmap based on my sculpt.

As with my older test, I will be creating a comparison between a normal, “current Gen” setup and the tessellation. Stay tuned!

More Tessellation


As expected, I continue doing my work on tessellation using UDK as my engine of choice. Talking with my tutor Josh, we discussed the areas we could go into with tessellation. After a long discussion we decided tackle tessellation in a way that the artist would have full control of how the tessellation works on each asset and how it would look.

After doing some research I concluded that using depthmaps based on sculpts created by the artist would allow for clear, concise, precise and fully art controlled tessellation.  This is the path I will follow from now on and what I will be working on in the next few weeks.

On another note, Josh has decided to put me in touch with a tessellation expert at Nvidia, so I will begin to make some work in order to show him and see if he can point me in the right direction.

Thursday, 11 October 2012

Tessellation it is!

After me and Josh had debated on the route I should take in terms of next gen processes, wwe decided to go with tessellation. 

I have been working hard on getting good results and I am now ready to show what I have been able to set up. This is a Work in Progress video but I believe it gets the point of tessellation across. Hopefully I will be able to develop this further and fix some issues that come with it. (UV seams are a bit of a problem right now!!)

Here it is!


So... Next gen?


My journey begins... and it really couldn't start any more exciting for me as having the possibility of looking at next gen processes. I Don't know what I might get out of this (given the limited access that I have to Next Gen engines and tools), however my focus will lie upon emulating what I think will be good next gen workflows and techniques for artists using the engines available to us today.
My first meeting with Josh had me shooting for what I thought what would be possible to do in the near future (with the dawning of the release of the next gen engines just around the corner), and where I thought the next gen might be going. Together we started brainstorming and with a little research I had done prior to the meeting, we decided to look at tessellation techniques and set-ups that could help us prepare us to generate "Future Proof assets". 


What do we mean by that?

With "Future Proof Assets",  we aim to develop assets that could be easily transferred to a next gen engine and have it work with all the elements of said engine, without extending production time for a studio , and thus, without generating more cost for that studio. to achieve this we must create this asset on an engine that is available to us now. A good example of why this would be very useful would be any game that would release close to whenever the next gen arrives. To maximize profit and efficiency, naturally, a studio would want to release his game on all possible hardware. However, the production cost and time implications of re-generating all game assets so that they work on the new engines and justify the game being on a next gen engine would typically be very large.

We aim to cut the cost and time of production, using assets that we can create on a "present engine" (such as UDK). These assets must work on both present, and next gen engines. However the next gen engine version must take advantage of the technological advancements of  the new engine.


 (Excuse the crudity of my drawings! :s)


To do this I will be looking at dynamic tessellation on in-game objects. I believe this is what the industry is moving towards. Understanding how to set this up and how to keep it cheap on the performance side can be hard... but I guess it wouldn't be worth doing if it wasn't a challenge!
 

So stick around, hopefully I will have some sort of approach to this sometime soon, and hopefully I will receive feedback from anyone who might read this.

Hello World!


Here we go!

Well, to put it simply, this will be my "Hello World" post. My name is James Burton, and I'm a video game artist. In my short experience I have mainly specialised in Environment art, however, I have always had a very technical approach to it since this is where my interest has mainly lied in the past few years.
I feel extremely proud to be able to say that I am working as an Environment/Tech Artist at White Paper Games on our debut title Ether. So far it has been an amazing experience. In fact I feel privileged to be able to work around the talents of Ben, Pete, Oj and NJ. I will be working on this game as I go through my MA and can only hope that the copious amounts I'm learning just by working on this game with the people around me will aid and add to the quality of my MA course as much as possible (however related or unrelated this MA might be!).


I really don't know what I hope to make out of this MA apart from expanding my knowledge in general game art, as well as developing my skills as a technical artist with the help of my tutor: Josh Taylor. But I guess not knowing where this MA will take me is a good thing; having an open minded approach to any new project has always been something I have held in high regard and for something as important to me as this, it certainly makes me wonder what I can achieve and will be able to achieve once I go through this journey. The uncertainty is scary, but it's damn exciting!


So I will leave it here for now, I've never been good with introductions, but I guess that there is not much introduction to be made when my career has only just started! I will update this blog as often as possible and hopefully review my progress in an honest way... my only hope is that whoever is reading this finds it as interesting and exciting as I know I will!